Showing posts with label tips. Show all posts

Dividing Circle into Equal Parts Without Measurements

Hello everyone!

So. Another tip. These things come as needed and right now it's because my mind wanders as I read about Foucault's governmentality, politics of resentment and popular media in education for one of my MA papers I need to write. My mind is broken. Ha!

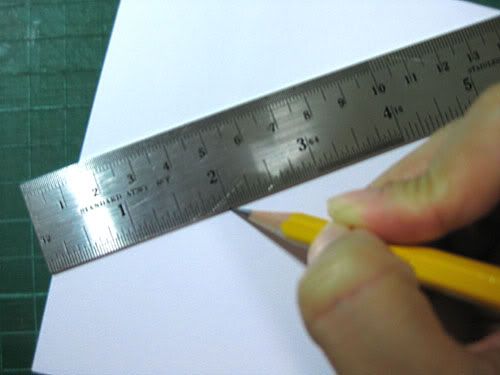
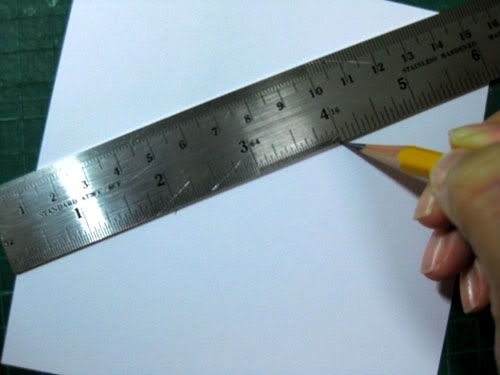
Anyway, this tip is about drawing wheel-like things like color wheel or pizza, as long as it has equal segments, without using straight rule or protractor because sometimes, that could be intimidating. This is only recommended if you're not required to draw anything with exact measurements. Of course, the number of segments, you can adjust as needed. However, as you may notice, it's only even-numbered segments.

I actually used this when I was preparing the color wheel worksheets for my young students. So, feel free to use it somewhere else that doesn't require accuracy. For this one, we will divide the paper in twelve segments which is just enough for a color wheel for primary, secondary and tertiary colors.

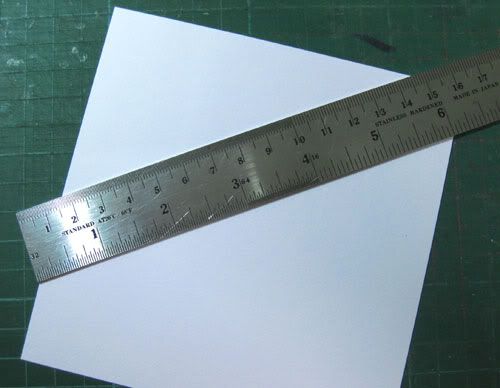
Step 1: You'll need a round object as pattern, pencil, a pair of scissors, and a slightly thicker paper (not board!). I'm using a drawing paper from my sketchbook.


Step 2: Trace your round object on the paper, then cut.


Step 3: Fold the circle in half. Make sure the edges of each half align with each other.


Step 4: Then fold again to make 4 segments.


Step 5: Divide one of the quarters into three by estimating and folding each segment. It's ok to make wrong folds; this is just your pattern.


Step 6: Draw a circle on another paper by tracing your round object. Start tracing the spokes of your wheel by opening up your pattern; lining the rounded part on one side; and then, tracing the line of the folded side to bisect your circle.


Step 7: Fold in the first segment, and draw a line along its folded edge to make your first segment. Fold under the first and second segments to get to the next one.


Step 8: Continue doing that, move your pattern around as needed, until you're able to finish dividing the half of your circle.


Step 9: Straighten your pattern again into a half-circle. Using its folded edge, extend the lines to the other half of your circle like so.


Step 10: Continue until your twelve segments are complete. Voila!


Now, that's a pie of 12 segments. 

This is how to divide by six.

Step 1: Same as before: trace and cut circle, fold into half-circles, and then fold a bit into quarters just to mark the center like this.


Step 2: Estimate fold the half circle into three like this. Do not crease at once. Tug and pull until each segment is almost the same size.


Step 3: To draw, trace again on paper the way we did above; using the folded edges of the pattern.


I hope I'm able to help.

Alternative to White Gel Pen


I should be starting posting projects, shouldn't I? I'm still up to my elbows in 2010 calendars, I can't see straight. In the meantime, let me talk about white inks and gel pens.

I know how most everyone in the scrapbooking and card making world loves our white gel pens. It gives an extra 'oomph' to our projects. But if you're like me and having all kinds of frustration about accessibility to it (read: I need it now! No time to order!), this is a perfect solution.

Any town with a technical school/college/university is most likely to have a school supplies store that sells technical pens and drawing ink. For me, I've always been a Rotring user so this is what I have. Other brands are also available such as Staedtler and Faber-Castell. The best part of it is, Rotring also have white drawing ink (and other colors like black, brown, yellow, blue, red) which you can buy for only Php100 and will go a long, long, long way. A few drops into the ink cartridge of the technical pen and it's good to go for awhile. Gel pens sell for about Php160 each. So, even if technical pens cost much more (about Php450 each, depending on point size), it's still cost-effective in the end because you only have to buy the ink when you're finished with a bottle. And you'll get different thicknesses if you're up to buying those college sets (includes three technical pens, ink, pencil and white rubber eraser in a set).

So, how long does a bottle of Rotring ink last? Look at it this way. A comic book's original size is 11" x 17". Now for a 22-page comic book that uses a lot of black ink, it only consumes about half a bottle of the same size.

Warning, though. Never use white ink on technical pens with sizes .10, .20 or .30. I would suggest that you start with .50 like the one I used above or thicker. White ink has the tendency to clog smaller sized pens and you'll have difficulty cleaning it. I lost a couple of .10 in my lifetime to white ink gunk.

That's my first tip in October and I hope it helps.

I really should start posting projects. All I post are tips.

Removing Adhesive Gunk from Your Scissors

This is one of those things we dread doing: cleaning our scissors from the sticky leftovers of our adhesive tapes. What we commonly do is, get a piece of masking tape and repeatedly use it to peel off the gunk. The thing is, I'm not as patient with this activity as I would have me believe.

Then I remembered that, back in those days when I was still working as scale model maker and we're using quick-dry glue, we use acetone or nail polish remover to clean our hands of the adhesive. So I thought, why not use it to clean my scissors. And it worked! Just take a cotton ball, wet with acetone or nail polish remover, and slide off the blade. It works really, really fast.

Dividing Your Paper in Equal Parts

This is something my father taught me in Grade 5 and it's such a very useful tip since then!

Sometimes, there are sizes of paper or canvas that we want to divide in equal parts but have difficulty doing so because the measurements of the paper are not divisible by the number of parts we want to get. Example, we want to divide a 4" x 4" paper into 3 parts, but 4" is not divisible by 3. Or 6" into 5 equal parts. Normally we would reach for our calculator and end up with an infinite X.33333333333 as the answer. But there is no .333333333 visible on our rulers. So, I present to you a very simple technique which, I think, is loosely based on the Complementary Angle Theorem in Geometry... but whatever. You are most welcome to correct me if I'm wrong about that. :)

Here we have a 5" x 5" cardstock that I'd like to divide into 3 equal parts. The problem is, 5 isn't divisible by 3.


The nearest number to 5 that is divisible by 3 is 6 and so, I twist my metal ruler so that the 0" mark is on the left edge, and the 6" mark is on the right edge like so:

6" divided by 3 parts is equal to 2" and so I mark my first part at 2" with my trusty No. 2 Mongol pencil

... and the second mark at 4"

Well, assuming your paper is a true square, meaning, the corners are 90 degrees to each other, you may easily use your T-square and draw your first line based on the mark you made. If not a true square, your lines will be askew. Here I'm using a tiny T-square I bought from NBS. It's only Php28.

And draw your second line based on your second mark...

And voila! You have a 5" paper divided into 3 equal parts without your calculator.

If for example you have a 6" paper that you'd like to divide into 5 parts, just twist your ruler and find the number that's divisible by 5. In the inches part of your ruler the nearest would be 10" but if you look at the centimeters part, the nearest to 6" would be 20 cm. By all means, go ahead and use that. It's ok.


So, I hope that helps!

"Oh, The Dread That's My Handwriting!"


It is a common affliction: the dread over one's handwriting on a scrapbook page. Many believe their handwriting are just atrocious, that they don't deserve to be recorded for posterity. I'll tell you what: the less you use it, the more uncomfortable you'd be with it in the long run. So, practice is the only answer.

One of the things I love about old documents are the handwriting of the officials who prepared them. The seeming uniformity of the angle by which the letters lean to; the size and shape of each character; the clever use of either a fountain pen or a ballpoint pen; and of course, I love, love the fluorishes for the capital letters and the final letters of a line or sentence. They are simply beautiful! But you know, if you look at them very closely, they are far from perfect. And that fact makes them one. Granted, they had no choice because there's no computer back then and, therefore, they had more practice with it.

This tip is for those who want to improve their handwriting and have that personal touch on their journals or scrapbooks. This is not really for those who want to be a professional calligrapher, because honestly, I don't know how to teach it.

First tip is to work on the slant of your letters. No matter how weird you think your letters look, if you have a seemingly uniform angle for your words, sentences or paragraphs, they'd look smashingly awesome! A cheat suggestion: instead of just lined paper you use as guidelines at the back of your writing surface, try adding diagonal lines (about 45 degrees) that run from end to end. Or lines perpendicular to your guidelines, however you'd like it to be. Follow that angle when you write and when you get the hang of it, try to write faster. The slower you write, the wobblier your lines are. The faster your strokes are, the better they look.

This won't happen overnight, I'm telling you now. So, if you really want it, try to be patient. Part that makes a beautiful handwriting is the confidence by which you do it and that only comes with constant practice. Like all skills, it requires practice, practice, practice. Remember also, that it is HANDwriting. It doesn't have to be 'perfect' like our computer fonts.

Your handwriting is part of the story you're telling in your journal or scrapbook. I certainly believe that it is a story on its own.

Till next time!


Ms. Ilyn is a licensed architect who decided that teaching arts and crafts, or making them, is way more fulfilling than dealing with contract documents, estimates and technical specifications. She taught Architectural Drafting and Painting to High School Students for five years, and Arts for Pre-K to Grade 3 Pupils for three years. Now, she's back to dealing with the nitty gritty of architecture, but the meditative aspect of papercrafting remains unchanged.

Please email us at: info.paperbasket@gmail.com